In this tutorial, you will learn how to use the Provision.io UI interface to build a powerful image classifier without an advanced technical background. The machine Pipeline process is fully automated thanks to the Provision.io platform.
The dataset
The dataset used for this example is composed of images of different components of a train:
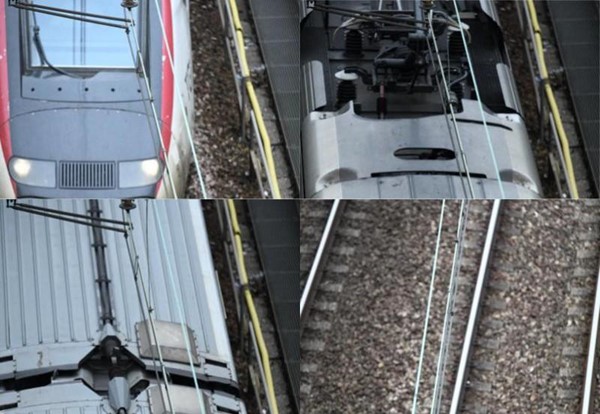
Each image is associated with a label from 4 classes:
- Faces
- Pantographs
- Rails
- Roofing
How an Image Classification experiment works
Image classification is a supervised learning problem: each image is labelled with its corresponding name, and then the classifier is trained to recognize them using the labeled pictures.
In order to launch a Provision AutoML experiment to the an image dataset, you need to follow these steps:
Step 0 – Sign up for a free trial of Provision.io
Visit www.Provision.io > Click Free Trial
Step 1 – Create a new project or use an existing one
In order to launch a new experiment, create a project or select an existing one so that you can gather experiments by type or by shared users.
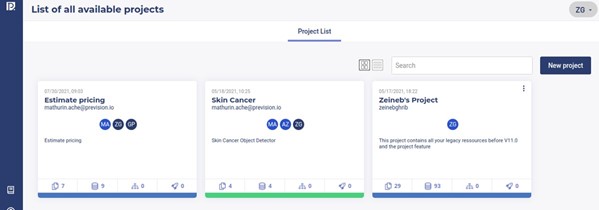
To create a new project click on “New Project” on the corner right of the interface:
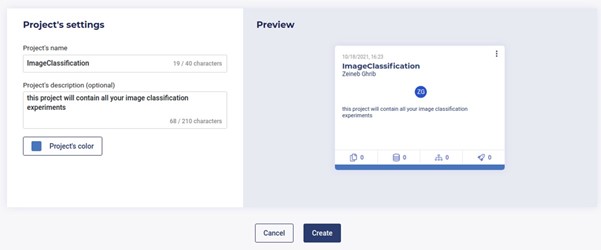
Then you add the name of the project and optionally a description as shown below then click on “Create” button:
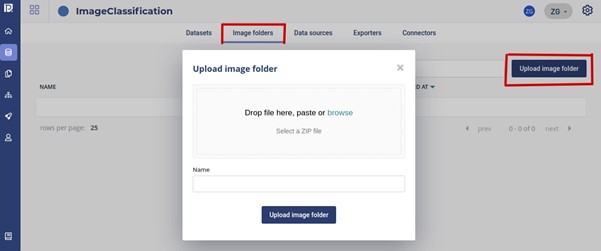
Step 2 – Upload an Image Folder
An “Image Folder” is a ZIP containing images that will be used to train models. To upload the folder, all you have to do is to select “Image folders” tab on the head of the dataset section, then drag and drop into the image box (see figure below):
Step 3 – Upload a tabular dataset
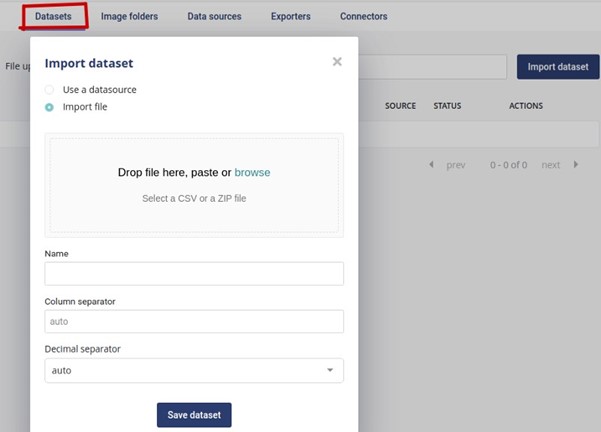
In order to launch the experiment, you also need to provide a csv that would carry out the mapping between the images (available in the image folder) and their corresponding labels. It should contain, at least:
- the filename: relative path to images within the image folder
- the target : the corresponding label
Since Provision.io also supports exogenous features for images experiments, this tabular dataset may also contain features that can be used as predictors to the models (temperature, nebulosity, time stamp of the picture, camera brand…)
To upload the dataset, you pick the “Datasets” tab, click on “Import dataset” button, then pick the “Import file” option:
Step 4 – Launch an experiment with Provision.io
As we deal with a multi-labelled dataset, it is a multi-classification training type: to launch the experiment go to:
- Experiments Section
- Click blue button ‘New experiment’
- Select the ‘AutoML’ mode
- Data type: ‘Images’
- Training type: ‘Multi-Classification’
- Choose a name to the experiment
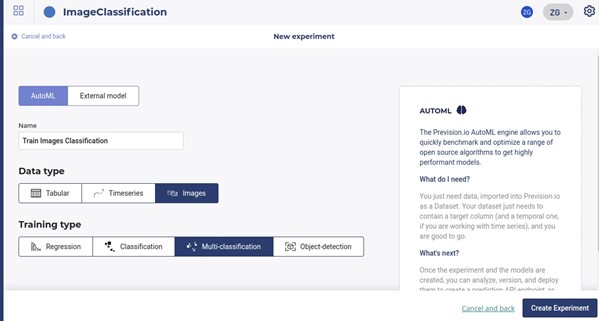
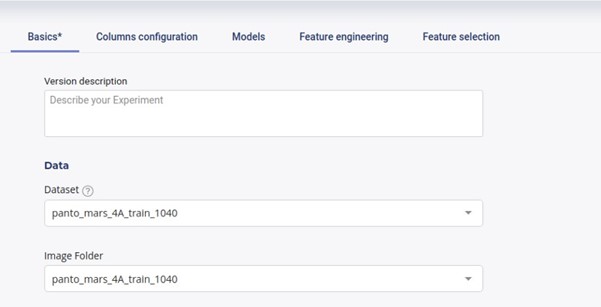
Then launch the experiment by clicking on “Create Experiment”. Before launching the experiment, some settings are required:
- Select the pre-imported dataset and the Image folder
2. Then chose the training options:
- The metric that will be used to train the models
- The training profile (Quick, Normal or Advanced)

3.Then configure the target and the images path columns by choosing the corresponding features:
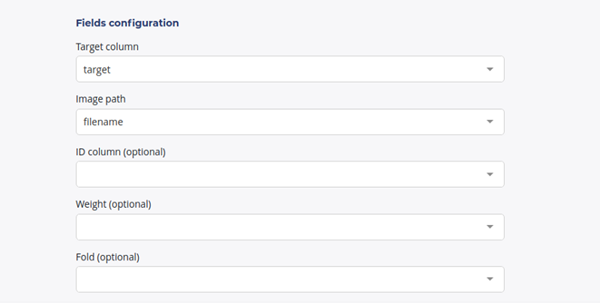
4.To configure the other experiment’s parameters (models, feature engineering ops…), you can browse the other tabs:
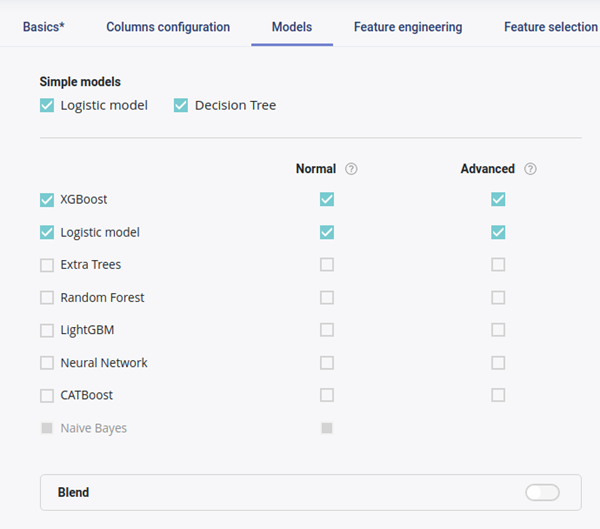
Note that this step is optional: the platform provides reasonable default settings for all the training types, making it easy to quickly create baseline experiments.
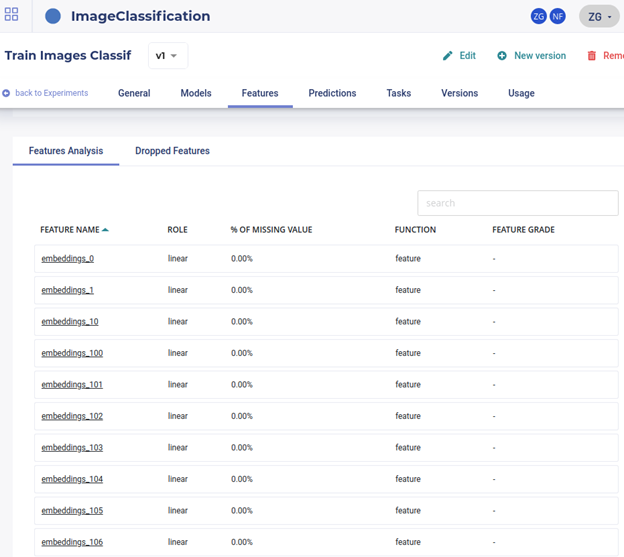
Once the experiment is launched, the platform performs several computations on the image dataset to extract images “embeddings” that will be used as input instead of the initial images. These embeddings are numerical vectors that carry efficient representation of the initial image input.
The image embedding operation is performed for two reasons:
- Transform the images into numerical vectors that are more ‘appreciated’ by the models: in fact numeric input is less sophisticated than images pixels
- Reduce the dimensionality of the data input

Once the experiment process finished, you can visualize the new generated embedding-features (even if it’s hard to find a nice name for them 🙃):
Step 5 – Prediction
To make a Prediction on new images: you have to:
- Upload the ZIP of images you want to predict creating a new io image folder (step 2)
- Upload the corresponding csv ( as explained on step 3)
- Go to the prediction tab, choose your model and launch the predictions:
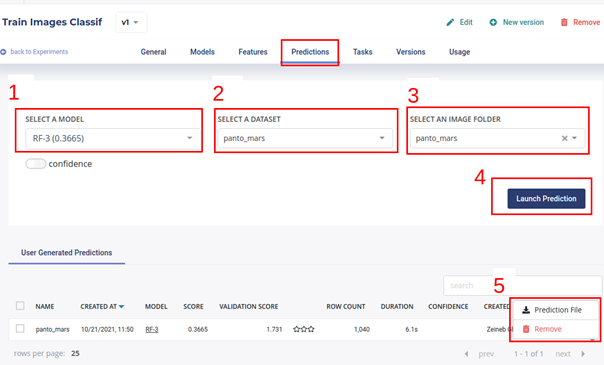
In step 4 (see figure above) after launching the prediction, a line will appear within the ‘User Generated Predictions’ tab’. Once the status is done you can download the prediction file (step 5).
Conclusion
In this post you learned how to use Provision.io, to create an image classification experiment, in a future post I will show you how to use the platform to create an ‘object-detection’ experiment. If you have any issues or need help, please contact me here.


