
So you have created a Machine Learning model with Tensorflow, Scikit-learn or any other framework of your choice. Now what? Most of us will now begin the struggle to have the model hosted and globally available in a production environment? If this sounds all too familiar, this article will provide you a hands-on guide to a friction-free deployment process.
Step 0 – Set up a test environment
Go to Provision.io Free Trial Sign Up Page to sign up and access the trial so you can follow along (5 minute set up time).
Step 1 – Preparing a model’s artifacts
You have built a specific Machine Learning model for solving a real world problem. There is a high probability that your model has been coded in Python (or even in R) in your preferred development environment, typically notebooks or more traditional IDE. Right now, this model only exists in the context of your environment and you’ll need to export it from there.
In order to enjoy the deployment capabilities of Provision.io, you first need to export your model in the ONNX format. If you don’t know how to proceed exactly, this operation can be seen in a detailed example here.
A quick sum up would be:
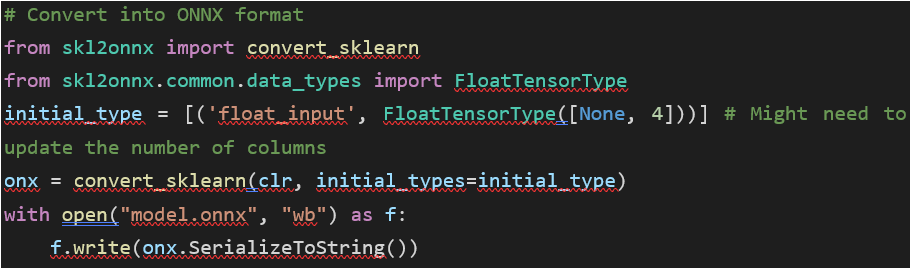
Right now, you should have available in your environment:
- An ONNX file (.onnx) that contains the model
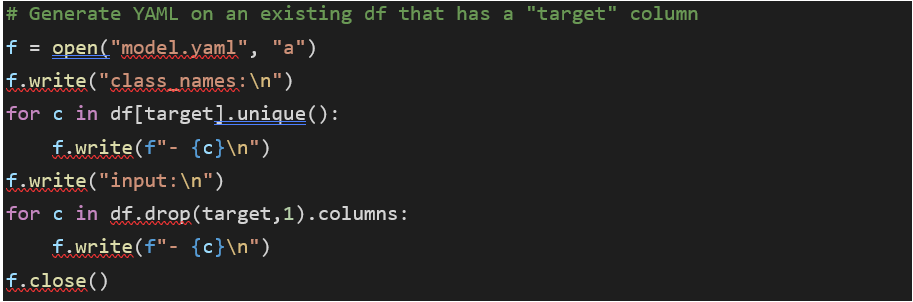
- A YAML file (.yaml) that describes the model (features / target)
- A holdout dataset that will contains features and target used for evaluating the model
- Optionally, the training dataset (nice to have for analytics purpose)
If you lack these files but still want to test the flow, I have set up a .ZIP archive that contains all you need to move forward and deploy a binary classification example. You can download it here.
Step 2 – Importing model’s artifacts
In order to proceed, connect to your Provision.io account, create a new project if not done and import data. The only one really needed is the holdout dataset but if you have the training data available, feel free to do it.
Then create a new experiment. Select the “External model” experiment type, configure it and import previously created artifacts.
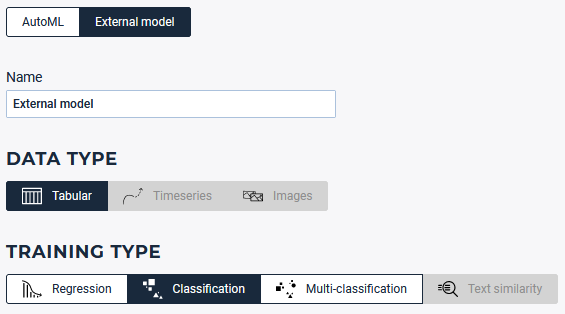
Select the external model experiment type, here a binary classification
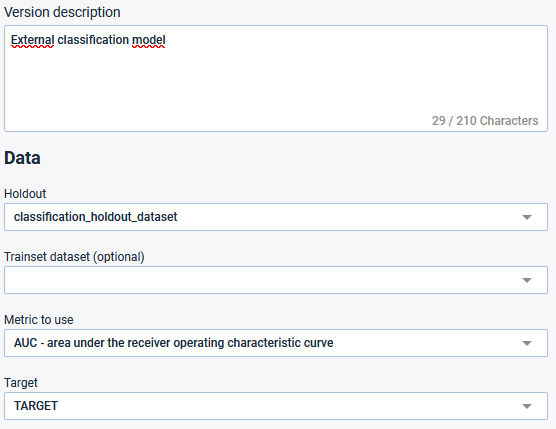
Select the holdout data set previously created and the TARGET feature
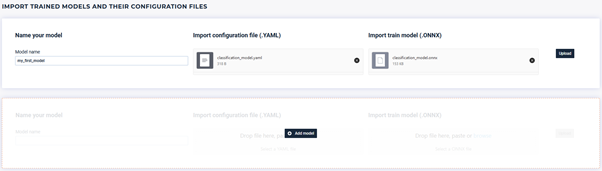
Upload .yaml & .onnx file
Note for advanced users, you can import more than one model in a single experiment! This can help you to better track results of what you did.
Step 3 – Deploying the model
Now that the model exists in the context of Provision.io and that every artifact has been given to the platform, deployment will take only a couple of seconds to achieve. Locate the deployment tab and deploy your previously created experiment.
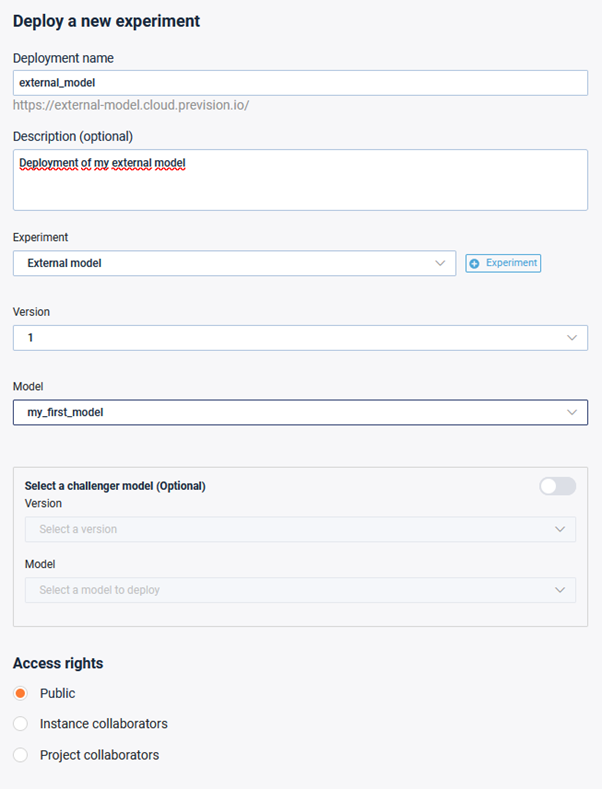
Experiment deployment configuration
A couple of notes to add in order to have a successful deployment:
- Name of the deployment should be unique. This will allow you to generate a URL that will be available, depending on the access rights specified
- You can deploy more than one model at a time using our champion / challenger feature. This is especially useful when you want to compare how two models might behave over time
- Access rights can be managed. The deployment could be either:
- Public: everyone that knows the URL can access the model
- Instance collaborators: only people registered on the instance can access it
- Project collaborators: only people with sufficient rights in the project can access it
Step 4 – Use the deployed model
Now that the model is deployed, there are 3 ways to interact with it:
- With the default web application generated behind the URL. Ideal to have a first look or to simulate model’s behavior and making what-if analysis
- With API’s that you can manage in the deployment dashboard. This will allow you to request the model from outside of Provision.io, typically using a third party web application
- With pipelines doing bulk prediction on the deployed model
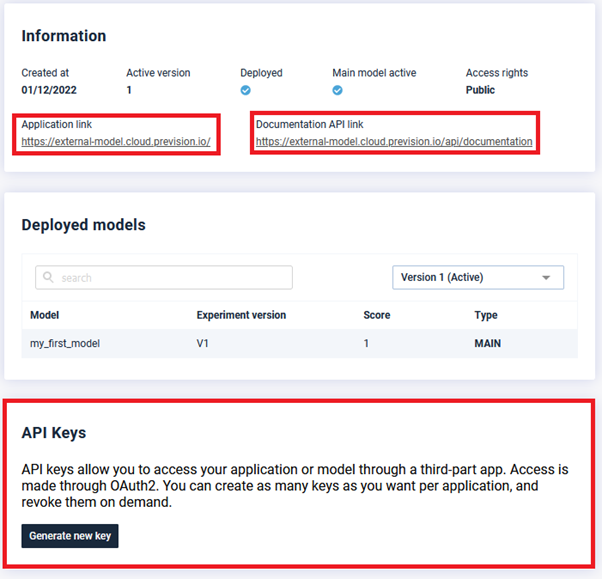
Application link (top left) – API documentation (top right) – API key management (bottom)
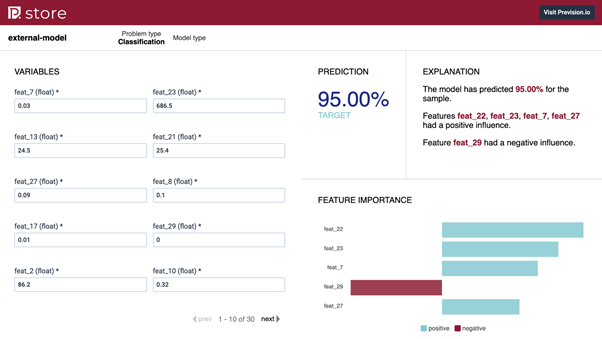
Default web application used to make prediction and explanation
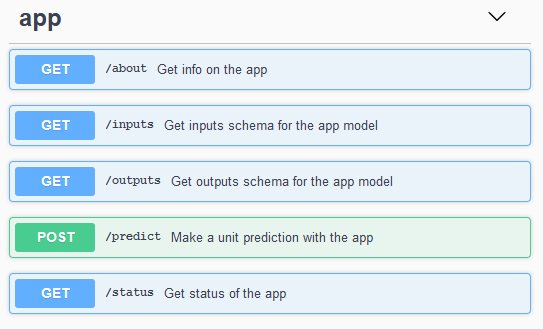
Self-generated API documentation in a swagger format
Step 5 – That’s it!
Well, this was pretty easy and should have taken around 5 minutes to complete this example. You now should be able to reproduce this on a real world model without any hassle. If by any chance you have more questions, feel free to refer to the technical documentation available here or reach out, we will be happy to help you get your model deployed!